GitHub and Git

We have all been here, taken by the Software Carpentry Version Control lesson.
This lesson of the Data Science Tapas Series we are going to explore Git and GitHub, essential tools for the modern scientist. Likely, if you have to work with code or have to use the computer, you may have found yourself in a GitHub repository looking at someone else's code (or on Stack Overflow) addressing the issue you are encountering. The initial concept of Git was to give coders a way to save and branch their code, and later on GitHub gave some of the fundamentals functionalities that allow code to easily be shared with collaborators as well as a myriad of other functionalities.
Here, we are going to go cover some of these basic functionalities, in an effort to help you understand how Git and GitHub can be essential to your work.
- Git vs GitHub overview
- Key GitHub Features
- Version Control
- Connecting Git to GitHub
- Pushing Changes From Your Computer
- Resources and Closing Remarks
-
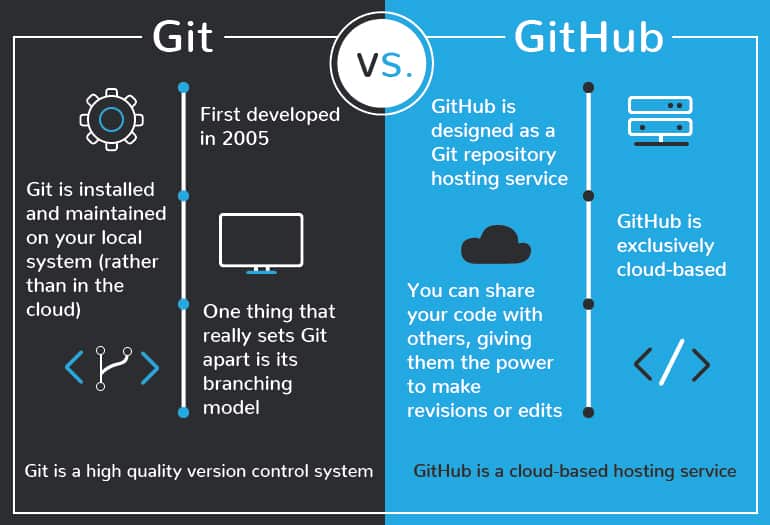
Git:
- First developed in 2005, git is a version control software that allows users to make changes and add versions to their code.
- Changes and versions are saved locally.
- Accessible through the Shell.
-
GitHub:
- First launched in 2008, its main focus is hosting and sharing code.
- Uses Git version control software.
- Changes and versions are saved online (requires an account).
- Mainly administered through the web (it also has a desktop app).
- Acquired by Microsoft in 2018.
Since we are talking about making science accessible, we invite you to use GitHub to save and share your code. Please start by creating a GitHub account at https://github.com/.
Upon creation of your account, you should be able to access your Dashboard. A number of social media like features are presented to you -- these have been added recently and it is up to you to use them or not. These are not the strength of GitHub, but these allow you to keep up to date with some profiles/accounts or repository that you Star (follow).
On your personal page, you will be able to add a picture, a description of yourself, and a link to your website. You can also add your location, your organization, and your pronouns. You can have a list of your most important repositories and show off your daily contributions. You are able to customize your profile to your liking.
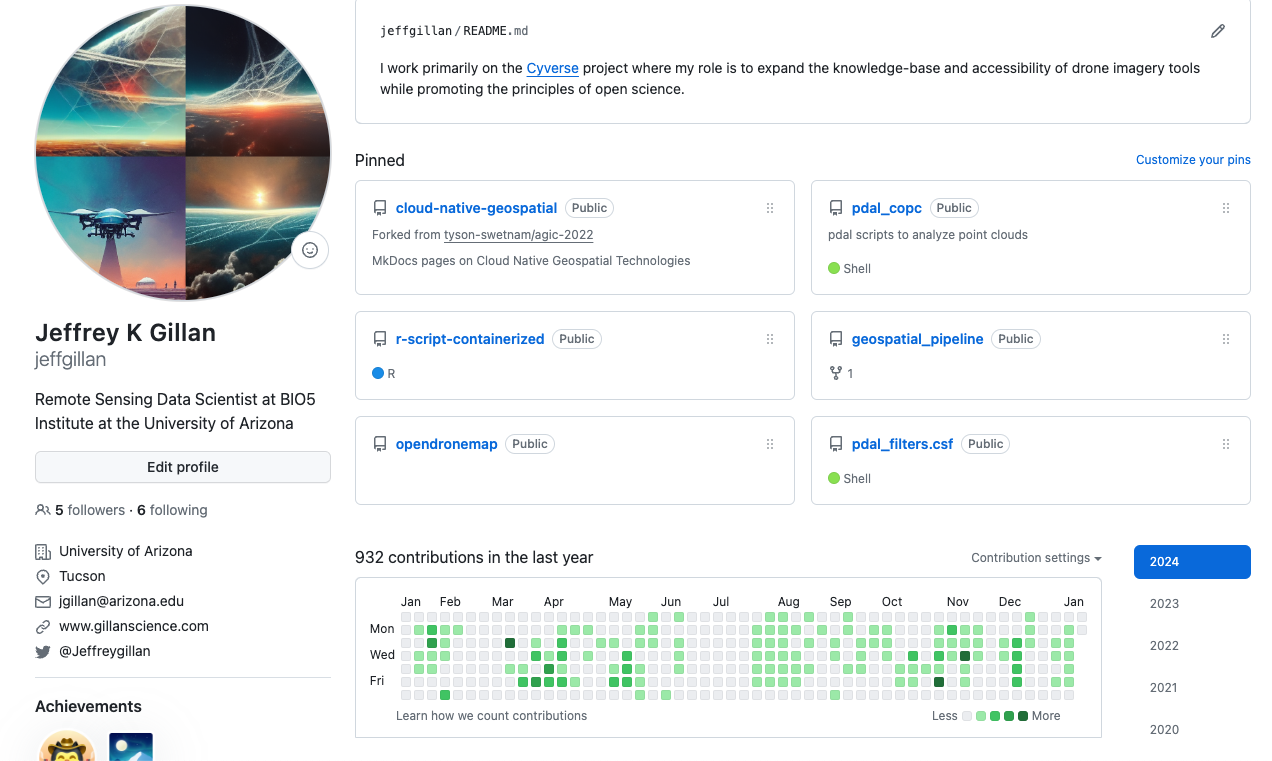
Check out this profile for a fancier example.
Outside of its more social media-like dashboard, GitHub has a number of useful features for working with and sharing code.
GitHub gives you the ability to create and manage your Repositories, a space were you can add and share your code. A suggestion is to have one repository for one project. Let's explore the features that come with each Repository.
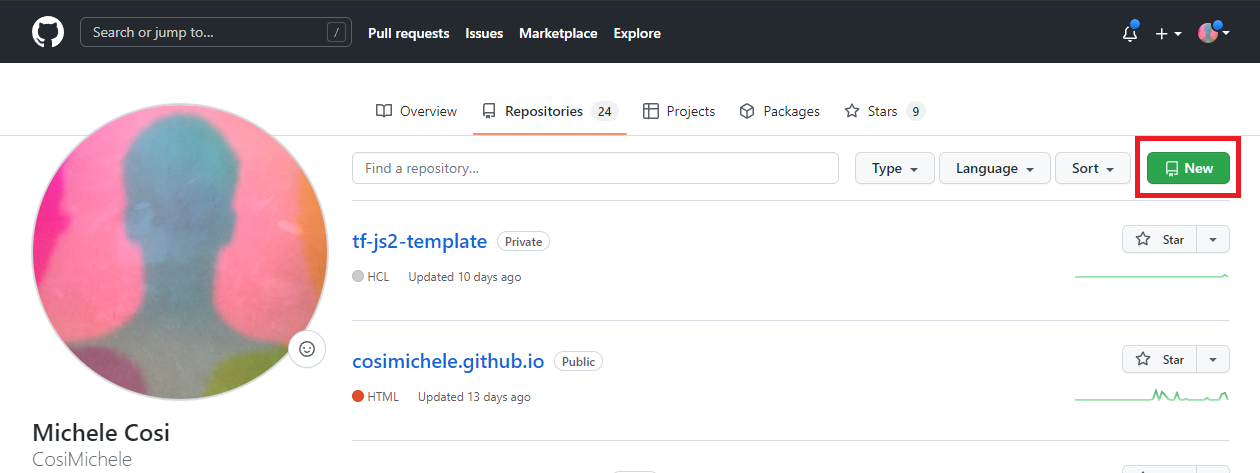
To create your repository, you can either click the + sign on the top right and select New Repository, or within your Repositories page, click the green New button.
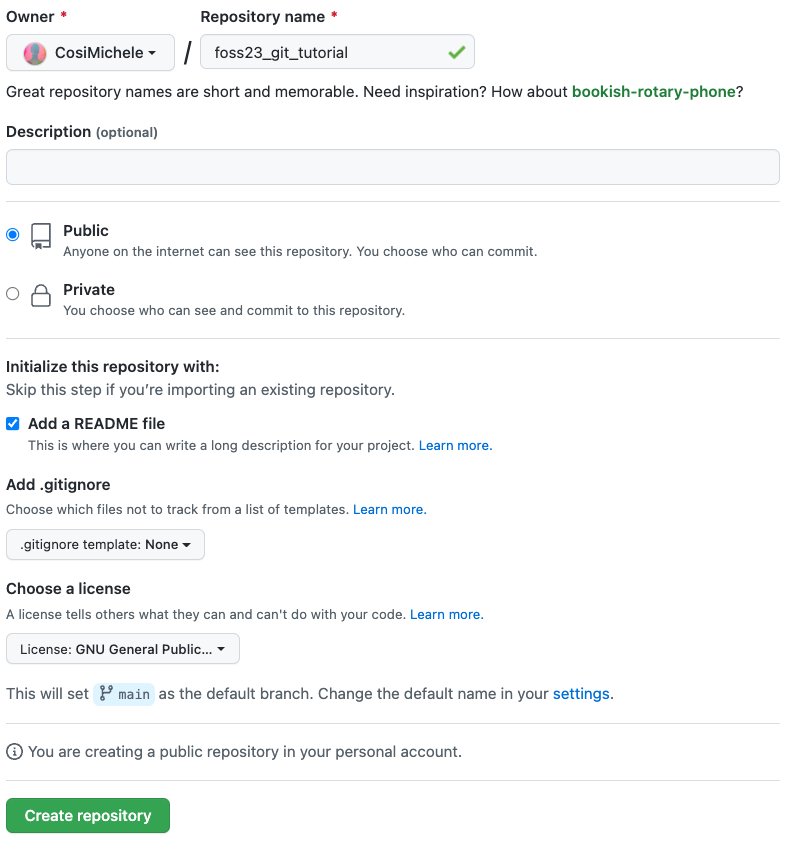
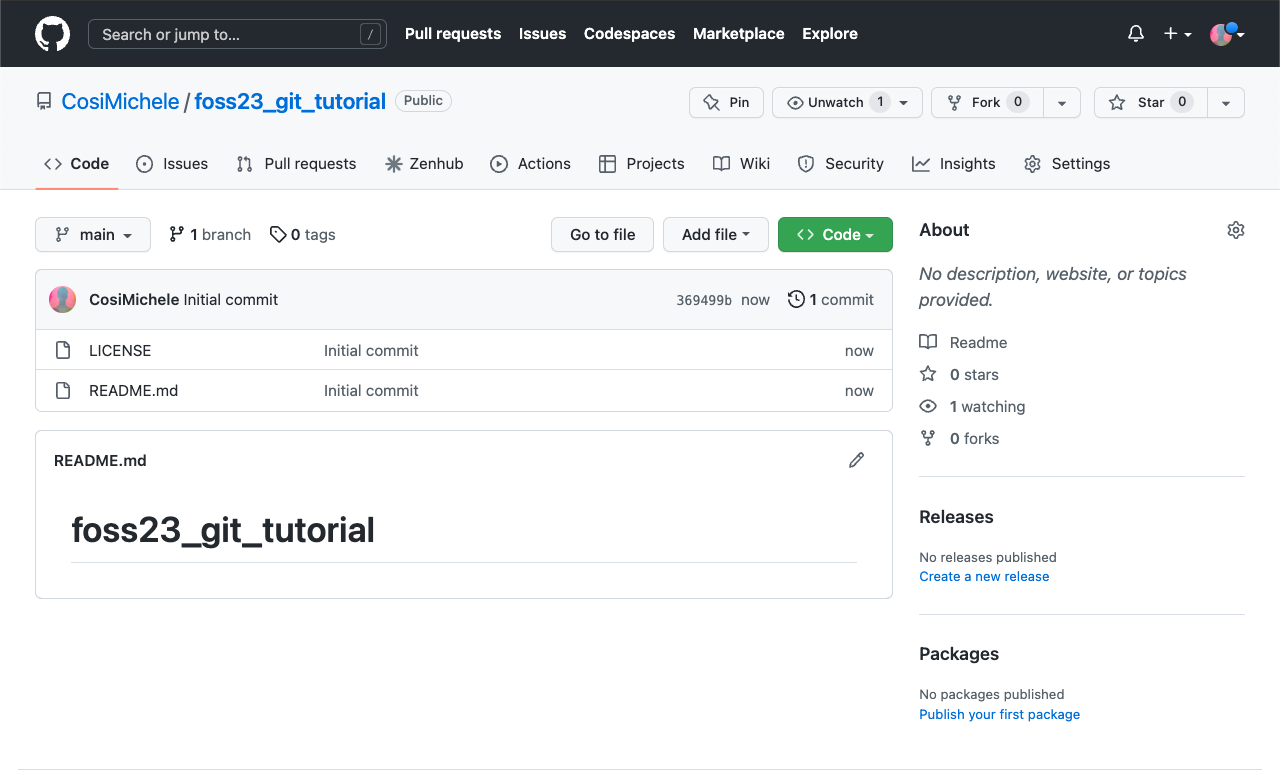
Here, you can choose the name of your own repository, choose to make it private or public, adding a README and a licence. It is strongly reccomended that you choose to add an empty README file.
So, why a README?
There are two main reasons why you would like a README file:
- It adds structure to your repository automatically - otherwise you would need to create said structure by yourself (not recommended for beginners).
- It is the "default" file that GitHub reads upon opening the repository. It can be treated as the go-to file that explains what the repository is for, what each file does, how to cite your reasearch, amongst other things.
Adding a Licence The addition of a licence can heavily contribute to the shareability of your code. Make sure that whichever licence you choose is in line with your principals as well as your project's. GitHub comes with a list of licences which you can review. It is also common to choose a licence later on!
Ultimately, your new repository should look like the following screenshot. Notice the LICENCE document and the README.md
Editing the README.md
The Github repository file has a .md extension which stands for Markdown. Markdown is a lightweight markup language for creating formatted text using a plain-text editor common throughout text files on the web. It uses symbols (*~-#`) for syntaxing text, and it is what GitHub (and this website!) use to format text. Markdown is easier to use than HTML. You can read more on Markdown on the Markdown Guide.
GitHub allows you to add and modify code in two ways:
- through the online portal (the webpage you're seeing)
- On your local computer using either the Desktop Application or the Command Line Interface (CLI).
Adding code to your repository through the web page is suggested if what you want to add is simple (Like a README file!).
- Click the Add File button, which will allow you to either create a new file, or upload files from your computer. Select Create New File.
- The editing page will open: choose a name and an extension on the top of the page.
- On the editing page you can modify code as you see necessary (writing, pasting)
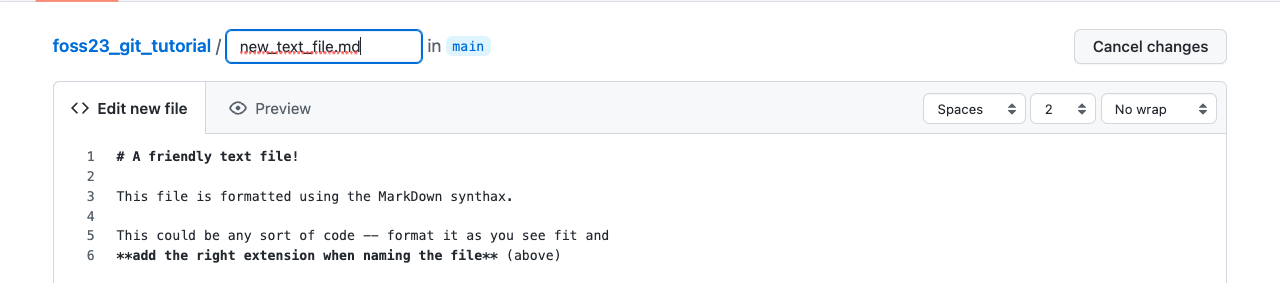
- You can also see your changes (if formatted) with the preview function (with the Preview button).
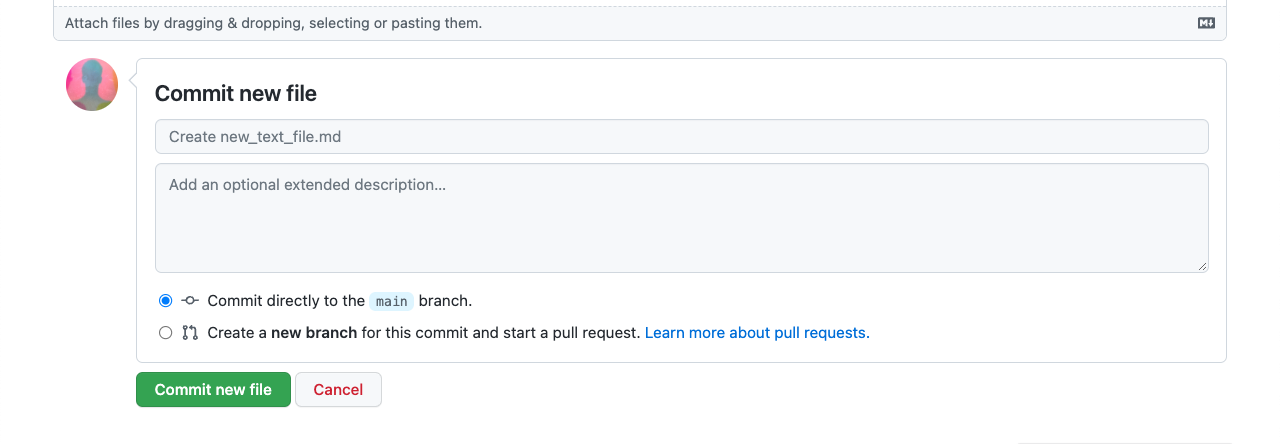
- To "Save" your changes, you will need to commit your changes:
- navigate at the bottom of the page, specify your commit with a name and add a description if necessary.
- You will be able to see your newly created file on your repository home after committing your changes.
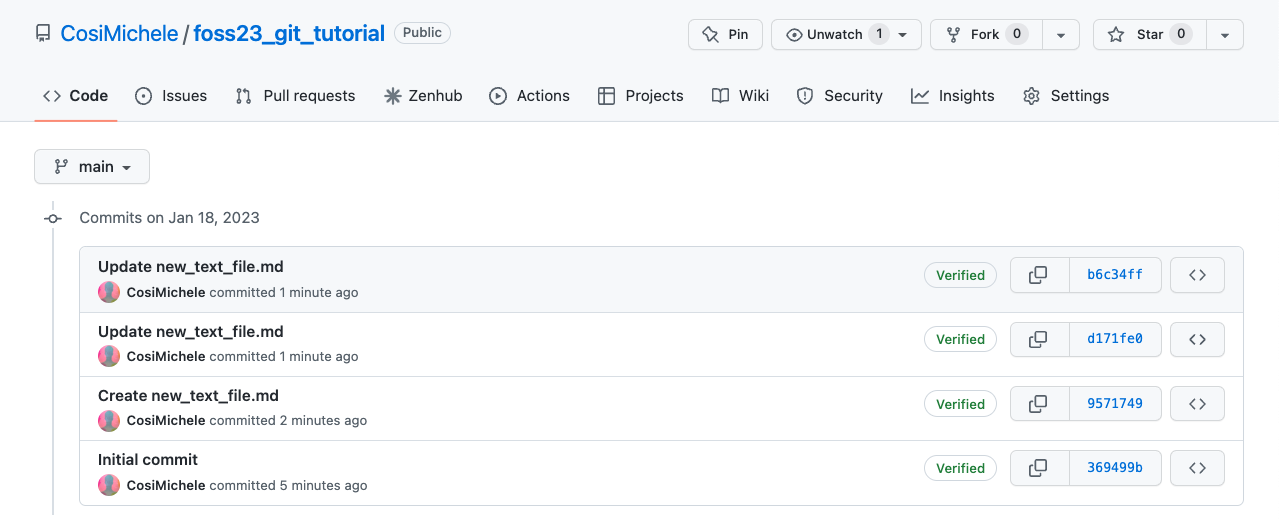
Committing is the term used for saving changes you've made to your code. Each commit can be accessed within the GitHub web interface, which will show you the code prior and after the changes you've made. To see a list of all commits you made, click on the clock icon under the Code button.
- You can see from the picture below the lines that have been removed (in red), and the lines that have been added (in green).
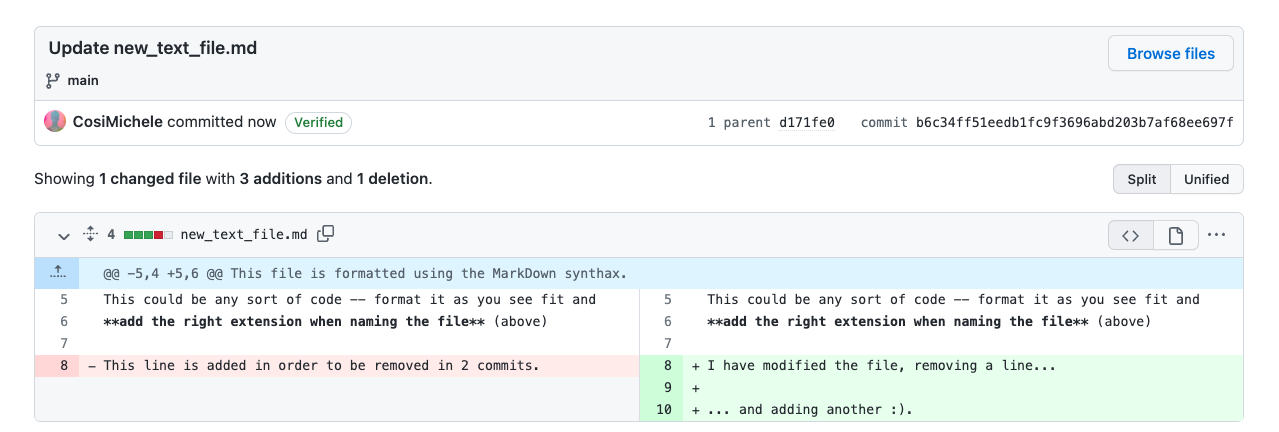
- Additionally, you can also see the full list of commits made to the file or repository.
When you commit changes to your own code, there are no checks that force you to review your code (unless you specify them). However, when someone else wants to add to your code, they need to create a Pull Request (PR). Pull Requests are created upon someone else's commit to your code. These need to be evaluated by you prior to merging (allowing the code to be added). You can view Pull Requests in the top menu of your Repository.
How does someone create a Pull Request? Forks!
One does so by "Copying" your repository, with an action called Forking. Forking creates a copy of your code in someone else's Account/Repository. Ultimately, this collaborator can "ask" to add the code they have worked on to yours by creating a PR. Everyone is able to Fork any public repository!
But what if I don't want to Fork the code but still want to contribute? Issues!
If you want to contribute to someone's code, let's say you spotted a bug for example, you can open an Issue. Issues are also available at the top of your Repository's menu. Issues can be created by anyone, and these are meant to notify the Repository's maintainer of problems, requests and conversations regarding the code and content.
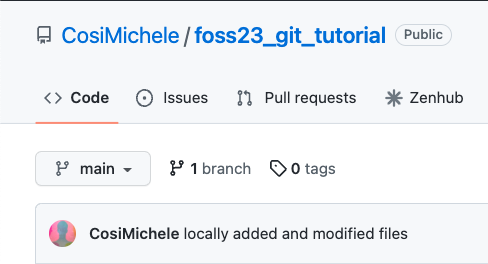
It was mentioned early on that Git and GitHub are incredibly important tools for code management. This is called Version Control (VC). We have seen that we are able to view the History of each Repository, and it is through this History that we can reset the Repository to that specific commit.
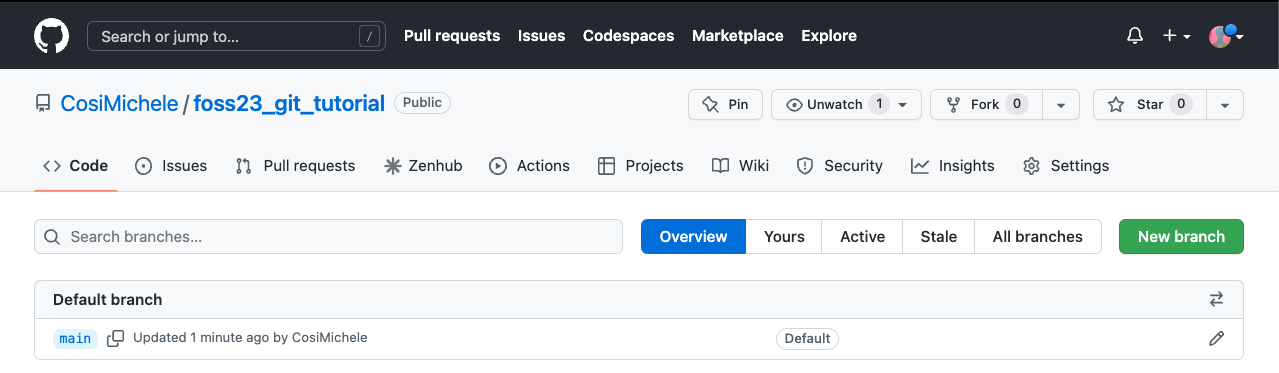
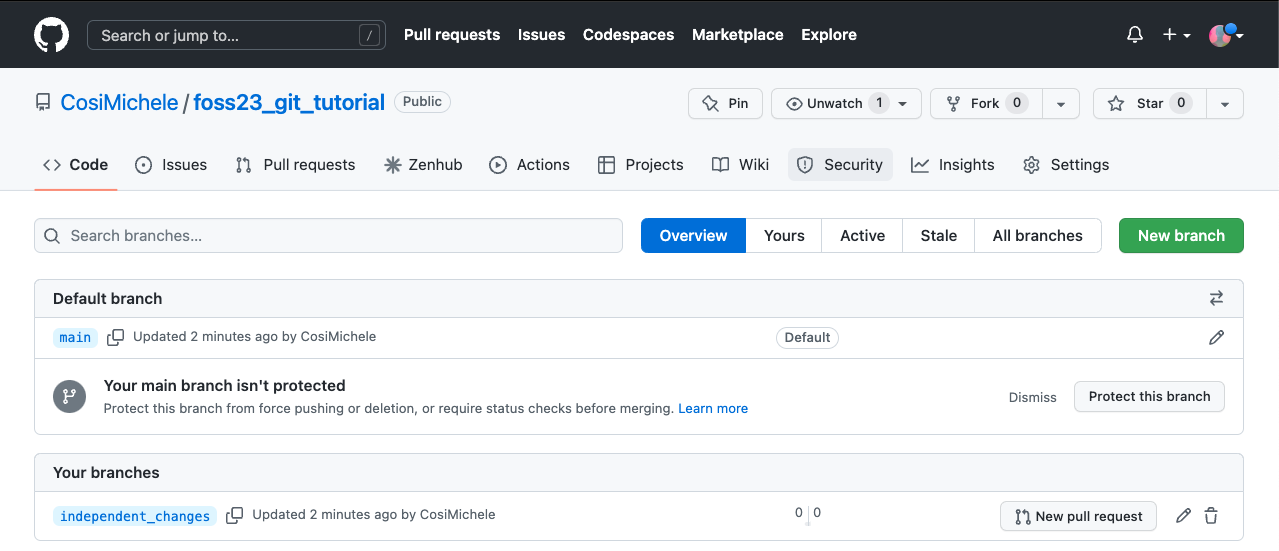
Additionally, we also have the power to work on the same piece of code, but on different levels. We call these levels Branches. Branching allows you to develop your code whilst in a contained environment separate from your main environment. You can view the list and number of branches on the top of your repository.
Why Branches?
Branches allow you to add/remove/change exisiting code independently from your main branch. This code can include alphas, betas and different versions of your code. Branches can be used to develop documentation or include different functionalitiets focused on Operating Systems and/or clusters and job schedulers. You can view your branches by clicking the branch button on the top of your repository.
Here you can view your current branches and create new ones. Select New Branch on the top right. Give the new branch a name of your choice, select the source of code (in this case the only source of code can be the main branch) and select Create branch.
You can now see the updated list of all your branches.
You can now use this new branch to create changes you are not yet ready to put in your main branch. Once ready, you can then merge your changes to the main branch (and if neccessary, delete your branch).
So far, we've covered GitHub, the online platform that allows you to share code. In order for you to modify this code locally, you will need to install Git. The official GitHub documentation is a great guide on the topic: https://github.com/git-guides/install-git. Select the correct OS and once installed, you will need to connect Git and GitHub.
You can do so in 2 ways: using Tokens or using Secure Shell (SSH). Although there have been rumors of Tokens going away, you can still use these for your work -- however, SSH seems to be recommended and therefore covered in the next section. You will need access to a Terminal or Command Line Interface (CLI) for this step.
To create an SSH key pair use the followinhg command where the -t option specifies which type of algorithm to use and -C attaches a comment to the key. In this case, ed25519 is the algorithm used to create the safe key
ssh-keygen -t ed25519 -C "<your email>"
The Terminal is then going to prompt a number of questions: where to save, name, passphrase and confirmation. We suggest to store the keys in their standard location.
Once created, you should see something similar to this
Your identification has been saved in /c/Users/<your username>/.ssh/id_ed25519
Your public key has been saved in /c/Users/<your username>/.ssh/id_ed25519.pub
The key fingerprint is:
SHA256:SMSPIStNyA00KPxuYu94KpZgRAYjgt9g4BA4kFy3g1o vlad@tran.sylvan.ia
The key's randomart image is:
+--[ED25519 256]--+
|^B== o.          |
|%*=.*.+          |
|+=.E =.+         |
| .=.+.o..        |
|....  . S        |
|.+ o             |
|+ =              |
|.o.o             |
|oo+.             |
+----[SHA256]-----+
This is the indicator that your key was created successfully. The next step is copy the key to GitHub.
First, we need to copy the public key. Be sure to include the .pub at the end, otherwise you’re looking at the private key. Likely, your key is in ~/.ssh/ in MacOS/Unix or /c/<your username>/.ssh/ .
The ~/.ssh location is where your ssh keys are stored. The following command is going to output the contents of the key:
cat ~/.ssh/id_ed25519.pub
The output will be something similar to
ssh-ed25519 AAAAC3NzaC1lZDI1NTE5AAAAIDmRA3d51X0uu9wXek559gfn6UFNF69yZjChyBIU2qKI <youremail@arizona.edu>
Copy the output and go to GitHub.
On GitHub:
- click on your profile icon in the top right corner to get the drop-down menu.
- Click “Settings,” then on the settings page, click “SSH and GPG keys,” on the left side “Account settings” menu.
- Click the “New SSH key” button on the right side.
- add the title (e.g., "Michele's Lab Laptop”), paste your SSH key into the field, and click the “Add SSH key” to complete the setup.
Now test connectivity on your computer by doing
ssh -T git@github.com
You should receive something simiar to
Hi <user>! You've successfully authenticated, but GitHub does not provide shell access.
If you received this then your computer is successfully connected to GitHub!
Now we need to tell git who we are:
git config --global user.name "<GitHub username>"
git config --global user.email "<GitHub email>"
❓ Why do we have to do both ssh and git configurations? ❗ Because remember: Git and GitHub are two different entities -- we establish connectivity to GitHub vi ssh, and we give credentials to Git so it knows who we are.
Adding code locally is a more complex than adding code through the web page, but it allows for better control on what files you commit.
To add or modify code locally, you need to clone the repository on your computer. You can then clone the repository by clicking on the Code button, and copying the link shown
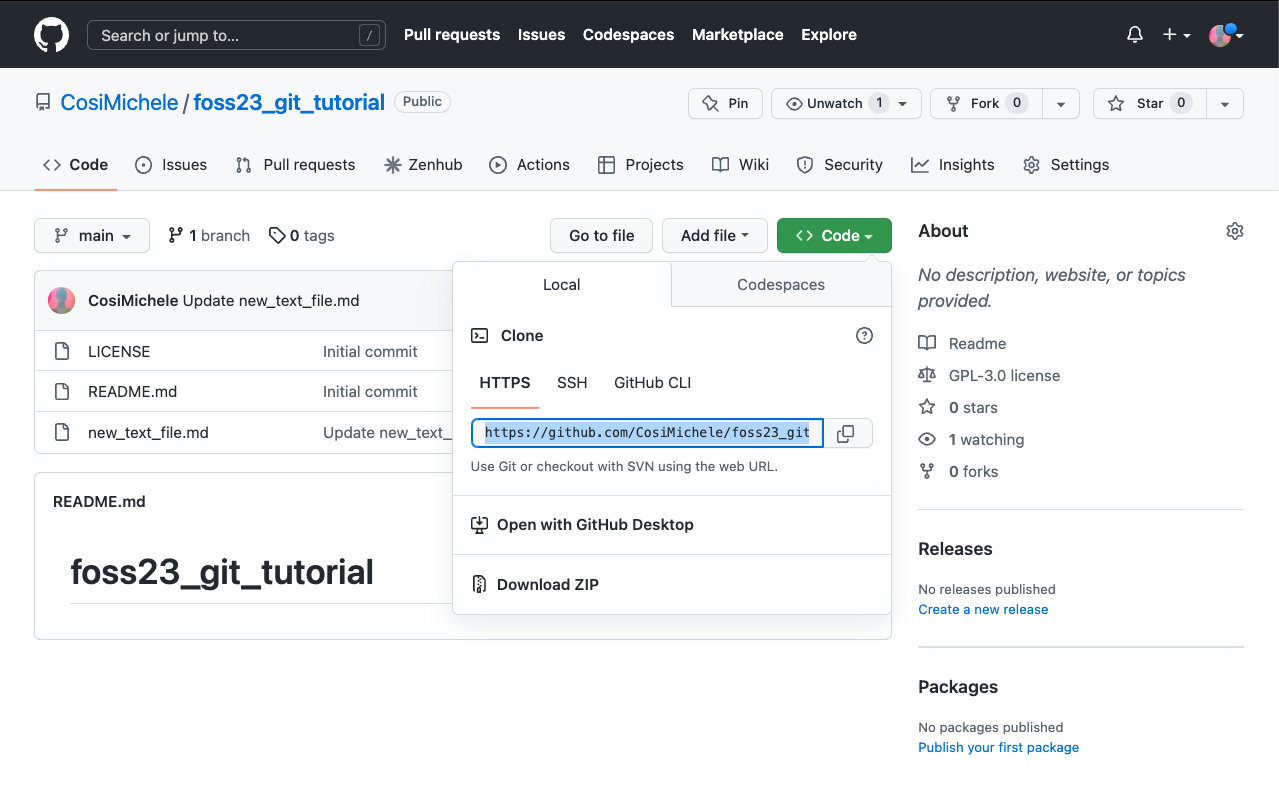
Since we have connected using SSH, make sure to copy the link under SSH.
On your machine, open a terminal window and type the following command:
git clone <repository address>     # Replace <repository address> with the link you copied such as below

$ git clone https://github.com/CosiMichele/3_git_tutorial.git
Cloning into 'foss23_git_tutorial'...
remote: Enumerating objects: 13, done.
remote: Counting objects: 100% (13/13), done.
remote: Compressing objects: 100% (12/12), done.
remote: Total 13 (delta 5), reused 0 (delta 0), pack-reused 0
Unpacking objects: 100% (13/13), 14.47 KiB | 90.00 KiB/s, done.
Your code is now available to you on your machine, and you can add and modify files as needed.
Once you have modified your code locally, you still have to push it to the repository. Prior to doing so there are a couple of steps you should do:
-
git status: it checkes on the status of the repository (files that have been modified, deleted, added - from either local or in the online repository) -
git pull: it checks and "pulls" changes from the online repository to your local repository. It ensures that you are always updated on the repository files and it can save a lot of time in case there are clashing commits from different users.
To do so:
Add all fiels you have modified and want to commit:
$ git add . # "." (period) stands for all files in a folder
Commit the changes. When committing changes, you have to add a message (in quotation marks) with the -m flag. This message is a concise and descriptive few words about what you did:
$ git commit -m "locally added and modified files"
[main 05f0ef6] locally added and modified files
 2 files changed, 11 insertions(+), 1 deletion(-)
 create mode 100644 file_from_local.md
Push your changes with push:
$ git push
Enumerating objects: 6, done.
Counting objects: 100% (6/6), done.
Delta compression using up to 12 threads
Compressing objects: 100% (4/4), done.
Writing objects: 100% (4/4), 585 bytes | 32.00 KiB/s, done.
Total 4 (delta 0), reused 0 (delta 0)
To https://github.com/CosiMichele/foss22_git_tutorial.git
   b649de3..05f0ef6  main -> main
You should now be able to see your changes online!
We have come to an end of the workshop. We have learned:
- The differences of Git and GitHub
- Navigating the GitHub platform
- GitHub features such as Repostories, History, Forks, Pull Requests and Issues
- What Version Control is and the Branching functionality
- How to connect your machine with GitHub and adding changes from your computer
Here are a number of resources you may want to check out:
- The Carpentries Git/GitHub lesson
- The FOSS lesson on Shell, Git/Github (here) and Version control (here)
- The GitHub Desktop App
Created: 01/30/2024 (M. Cosi).

